Pre-ride safety check (2-minute habit)
Learn a quick routine for tyres, brakes, wheels, and steering. Designed to catch common issues like soft tyres, rubbing brakes, or a loose seatpost before you roll.
Tools: none required, pump recommended.
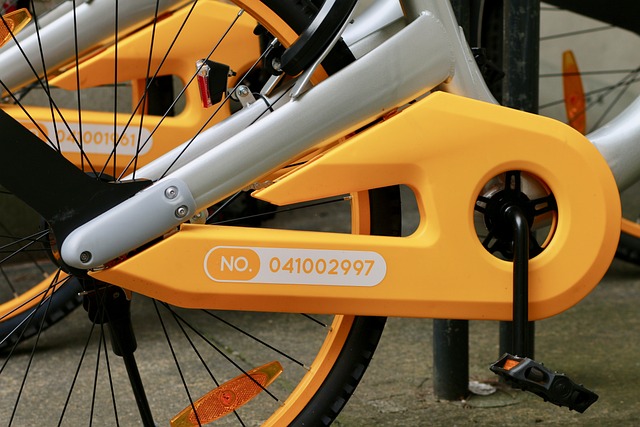
A small, tidy kit covers most beginner tasks. Start with a pump with a gauge, tyre levers, a spare tube, a small multitool, and chain lubricant suited to wetter weather. Add tools only when you understand the job and the risk.
Safety note: if brakes feel weak, wheels wobble, or parts are cracked, do not ride until inspected by a qualified mechanic.
Learn the habits that prevent common problems, especially in wet and gritty conditions.
Maintenance feels intimidating when every issue looks the same. Our approach is to start with observation and simple checks, then build a routine that matches how you actually ride. For most recreational cyclists, the biggest improvements come from keeping the drivetrain clean enough to run smoothly, maintaining correct tyre pressure, and ensuring brakes are working predictably. We explain why certain shortcuts cause trouble, such as spraying high-pressure water at bearings, over-lubricating a chain until it collects grit, or touching brake rotors with oily hands. You will also learn how to interpret common sounds and sensations: a rhythmic rubbing, a click under load, or a pulsing brake feel. Each topic focuses on the “why” behind the steps so you can make safer decisions and communicate clearly if you need professional servicing. The result is not perfection. It is a bike that feels consistent and a rider who knows what to check before heading out.
A short routine after wet rides helps prevent corrosion and keeps shifting and braking predictable. Small actions done often beat big actions done rarely.
If a task involves structural parts, hydraulic systems, or damaged components, it is safer to pause. We list warning signs and what to ask a mechanic.
If you are learning at home, take photos before changing anything. It helps you restore cable routing, spacer order, and small part orientation safely.
Practical topics you can learn in short sessions. Each module includes what to prepare, what to check, and what “done” looks like.
Learn a quick routine for tyres, brakes, wheels, and steering. Designed to catch common issues like soft tyres, rubbing brakes, or a loose seatpost before you roll.
Tools: none required, pump recommended.
Understand degreasing, drying, and lubricating without overdoing it. Learn what a properly lubricated chain looks like and how to reduce grit build-up.
Tools: rag, brush, lubricant, optional degreaser.
Learn the difference between pad wear, contaminated pads, and cable or hydraulic issues. We focus on safe inspection and clear warning signs.
Tools: light source, clean gloves, basic hex keys.
A practical method to remove the wheel, find the cause, and replace or patch a tube. We explain how to avoid pinching the tube and how to seat the tyre safely.
Tools: tyre levers, tube or patch kit, pump, optional gloves.
Learn a safe, beginner-friendly way to identify misalignment, cable tension issues, and drivetrain wear. We focus on diagnosis and small adjustments.
Tools: hex keys, clean rag, bike stand optional.
A guide to symptoms that warrant a mechanic: persistent brake issues, wheel play, cracked parts, or drivetrain wear beyond simple cleaning. Learn what to describe and what questions to ask.
Tools: none, bring notes and photos if possible.
Bikes vary. Tyres, brake pads, chains, cassettes, and even tool sizes can differ between models and years. We encourage you to identify your components and confirm compatibility before buying replacements. The Guides section explains key terms so you can read labels and specs with confidence, and avoid replacing the wrong part.
Knowing what not to do is part of good workshop learning. This section helps you avoid common mistakes and recognise when a job should be handed to a professional.
High-pressure water can push grit into bearings and seals, shortening the life of hubs, headsets, and bottom brackets. A gentle rinse, soft brush, and careful drying is usually safer. If you ride in heavy rain or on gritty lanes, focus on wiping and re-lubricating the chain rather than blasting the whole bike.
Lubricants should never touch rim braking tracks, disc rotors, or brake pads. Contamination can reduce stopping power and create noise. If you suspect contamination, stop riding until the cause is identified. Cleaning may be possible, but sometimes pads must be replaced for safety.
Cracks, dents, or unusual flex in frames, forks, handlebars, stems, and seatposts should be treated as serious. Do not attempt to ride until the part has been inspected. If you are unsure whether damage is cosmetic or structural, assume it is unsafe and seek professional assessment.
If a maintenance step changes how you stop, steer, or hold the bike together, work slowly and check manufacturer instructions. If you cannot confirm it is safe, pause and ask a qualified mechanic.